Showing posts with label #MSDynamics. Show all posts

Thursday, 19 May 2016

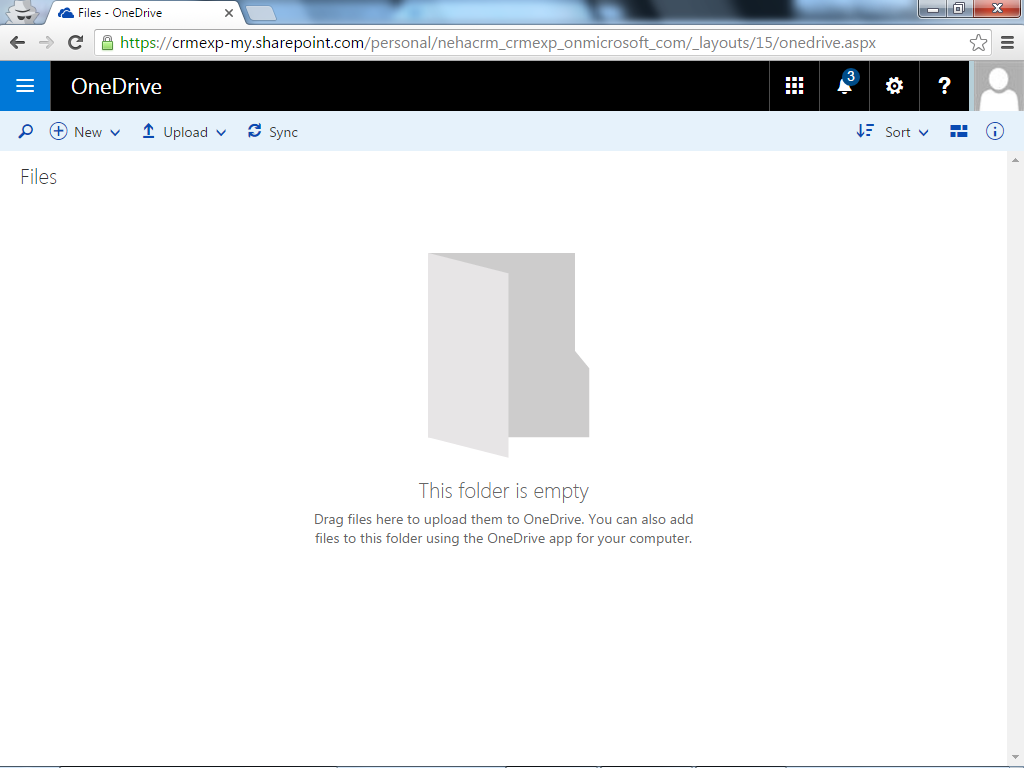
OneDrive Integration with Dynamics CRM 2016 Online

For configuring OneDrive login to office portal

1. Go to portal office page, Select OneDrive icon


2. Below screen displayed


    3. Click Next, go to below screen


  4. Click 'Your One Drive is Ready'.


 5. Enable sharepoint integration before going to next step. 

6. Go to CRM online, ‘Settings’ >> ‘Document Management’ >> ‘Enable One Drive for Business’ and click OK.


 7. On Enable Document Management Page shows one more option 'OneDrive For Business Folder Settings'


 8. Click on 'OneDrive For Business Folder Settings', a window displayed with folder name. One can change this folder name.


9. For uploading any document to One drive through CRM, Open any entity say Accounts and go to Document.


10. Click Upload button to upload document.


11. File will upload successfully and it will show in crm.


12. Uploaded document will show up in Onedrive on clicking Open Location.


Hope this will help you all....

Friday, 13 May 2016

Plugin Debugging using Profiler in CRM 2016

Steps for Debugging:


  1. Connect to CRM with SDK plugin registration tool.
  2. Install the profiler by clicking 'Install Profiler'.

   3. A new branch is added to Register Plugin and workflow activities.


4. Select a plug-in step and click Start Profiling in the toolbar to begin profiling. Below screen pop up, click OK.


5. Perform the operation in CRM that causes the plug-in to run.


 6. Click on Download Log File button to save the ErrorDetails.txt file on  computer.

7. Open the plug-in solution in Visual Studio and go to Debug  --> Attach Process and select       
    PluginRegistration.exe, Click Attach button.


8. In Plug-In Registration Tool, click the Debug button. Select ErrorDetails.txt for the profile location and browse assembly location to debug.


10.  Click the Start Execution button, and debugging will start in Visual Studio.


MS Dynamics CRM Plug-In Deployment

To deploy Plugin sign the assembly with a strong-name key file and register the plugin.

1. Go to Project properties.


2. Go to the Signing tab, and check the Sign the Assembly check box. Enter name of new key(password is optional) and click OK.


Stong name key will be added to solution explorer of project.

Plugin deployment can be done in 2 ways programmatically and through SDK toolkit found at location '..\sdk2016\SDK\Tools\PluginRegistration'.


1. Run exe of pluginRegistration tool.


2. Click on Create New Connection --> Enter login region, Name and password--> Click Login button.


3. After login below screen shown up.


4. Register--> Register new assembly.


5. Browse the dll and click 'Load Assembly' button and click OK.


6. When the assembly is registered, a confirmation window appears.


7. Expand the registered assembly.


8. Registered assembly must registered with an event and entity.

9. Click Register--> Register New Step Menu.

10. Register a step (and select the entity and event), enter a message in the Message text box.


11. New Step will be added.

Monday, 18 April 2016

Microsoft Dynamics CRM browser support

Microsoft Dynamics CRM 2013 supports the following web browsers:


  • Internet Explorer 8, 9, 10, and 11
  • Mozilla Firefox—latest publicly released version*
  • Google Chrome—latest publicly released version*
  • Apple Safari—latest publicly released version**

* Both Mozilla Firefox and Google Chrome are supported only if they are running on Windows 8, Windows 7, or Vista (or Nexus 10
tablet for Google Chrome).
** Apple Safari is supported only if it is running on Mac OS X 10.7 (Lion) or 10.8 (Mountain Lion).

Google Chrome is one of the fastest at initial page rendering.

Portable Business Logic (PBL)—Business Rules

Previously  to customize a form and display an error message or show and hide a field,  JavaScript t was used to make it work. With PBL, you can do it without any JavaScript!
The following actions are available with PBL:

  • Show error message
  • Set field value
  • Set business required
  • Set visibility
  • Lock or unlock field
Business rules provide an easy declarative way to consistently evaluate the business logic on both client and server, without the need to write code.


To create or edit PBL, navigate to the customization of the form and select Business Rules on either
the UI or on the solution navigation.

Business Process Flows (BPFs)

business process flow lets you create more efficient and streamlined sales, service, and other business processes. Having high performing processes in place will help you to increase your win rates, improve customer satisfaction, and grow your revenue.

Users are guided through various stages of the sales or customer service processes. At each stage, you complete specific steps and then move to the next stage. You can customize the process flow by adding or removing steps, changing the order of the stages, or adding new entities to the process flow.


The process flow will tell you where you are in the process, where you came from, and what to do next. You are able to continuously monitor your own progress.

BPFs can be used on the following entities:
Account
Appointment
Campaign
Campaign Activity
Campaign Response
Competitor
Contact
Email
Fax
Case
Invoice
Lead
Letter
Marketing List
Opportunity
Phone Call
Product
Price List Item
Quote
Recurring Appointment
Sales Literature
Order
User
Task

Team

In case of Custom entities, the Business Process Flows (Fields Will Be Created) option must be selected.


Key benefits of BPFs include the following

  • BPFs allow organizations to define the specific steps that need to be taken for something to happen.
  • BPFs allow organizations to track where in the process the record is.
  • BPFs allow for “stage-gating,” which requires data to be entered before proceeding to the next step.
  • BPFs are visually represented on the record.
  • BPFs can be controlled through portable business logic (PBLs) and workflow. An example of this is when a field is hidden via a PBL or a value is populated via a workflow, the BPF incorporates this change as well.
  • BPFs allow for multiple entities in the BPF (up to five).
  • There can be 10 active BPFs per entity.
  • Users with appropriate security permissions can edit the BPF in real time to incorporate new rules.
  • Users can switch BPFs midstream to new BPFs if the situation changes. A common example of this is when an inbound call creates a case with a Case to RMA (Return Merchandise Authorization) process, but it turns out the user just has a question; in this case, the user might change the BPF to Case to KB (Knowledge Base).

Limitations:

  • An entity once selected during design of the BPF cannot be referenced again (except to close the record), and no more than five entities can be referenced.
  • If a user’s security permission does not allow using a BPF, the BPF will be visible but disabled.
  • A maximum of 10 BPFs per entity can be active. (You can have more, but only 10 can be active.)
  • There is a maximum of 30 states per BPF.

System business process flows

Microsoft Dynamics CRM includes the following business process flows. 
  • Lead to Opportunity Sales Process
  • Opportunity Sales Process
  • Phone to Case Process
“Ready-to-Use” BPFs
Microsoft has included a package of 12 other BPFs in the system, but they need to be deployed. To deploy them, navigate to Settings, Data Management and select Add Ready-to-Use Business.


To make new BPF one must has the Manager, Vice President, CEO-Business Manager, System Administrator, or System Customizer security role or equivalent permissions.


Thursday, 3 December 2015

Create Custom entities in MS Dynamics CRM 2015 online


  1. On the  navigation pane of CRM, click on the Settings --> Customizations --> Customize the system(Also can proceed from custom solution)
  2. Click the Entities node in the solution explorer and then click New in the menu bar.

3. Complete all required fields Display Name, Plural Name and Name.


4. Select whether the entity will be owned by a user or team/organization

5. Select Areas that display this entity section, select Sales and Marketing.

6. Click Save and Close to close the new entity form.

7. Publish the customization. Entity will be seen under Sales and Marketing.

Tuesday, 1 December 2015

Difference between CRM Discovery Service and CRM Metadata service?

CRM Discovery Service:

A single Microsoft Dynamics CRM installation can host multiple organizations on multiple servers therefore it is important to specify which organizations need to be accessed. The Discovery Web service returns a list of the organization the specified user belongs to and the URL endpoint address for each organization. It will only give organization related information.

CRM Metadata service

It is specific to CRM records. Use to interact with entities and attributes like create, update or delete, retrieve or add value to pick list. It holds information about entities and attributes.

  • An index in a book is Metadata, it helps you categorise/segment the information
  • Metadata is the characteristics of the data e.g. data type, length, description
  • It can show the relationships between data
  • Metadata allows efficiently classify and a structured way to organise data for ease of use
Use the IOrganizationService web service to read and write data or metadata.

One of the common uses for Metadata is to retrieve the string value of an optionset.  OptionSets are stored in the CRM database as Int numbers and the string values are in the Metadata.